Why You’ll Love This Apple Pie Recipe
When you take a bite of this homemade apple pie, you’ll instantly understand why it’s a classic favorite. The warm, spiced aroma fills your kitchen, wrapping you in comfort.
Each slice combines tender apples with a perfectly flaky crust that’s just the right amount of sweetness. I love how the cinnamon and nutmeg dance together, creating a nostalgic flavor that brings back memories of family gatherings.
Whether it’s a holiday or just a cozy evening, this pie never fails to impress. Trust me, once you try it, you’ll want to make it a regular part of your dessert rotation!
Ingredients of Apple Pie
Making a classic apple pie begins with gathering the right ingredients. The beauty of this recipe lies in its simplicity, yet the combination of flavors creates something truly special. Envision this: a flaky crust cradling sweet, juicy apples, all seasoned with a sprinkle of cinnamon and nutmeg. Are you salivating yet? Let’s explore what you’ll need to capture that warm, homestyle goodness in your own kitchen.
Ingredients for Apple Pie:
- 2 cups all-purpose flour
- 1/2 teaspoon salt
- 2/3 cup shortening
- 6-7 tablespoons cold water
- 6 cups thinly sliced peeled cooking apples (about 2 1/4 pounds)
- 1 tablespoon lemon juice
- 3/4 cup sugar
- 2 tablespoons all-purpose flour (for the filling)
- 1/2 teaspoon ground cinnamon
- 1/8 teaspoon ground nutmeg
- 1/2 cup raisins or 1/2 cup chopped walnuts (optional)
Now, let’s talk a bit about the ingredients themselves. When it comes to apples, you’ll want to choose a variety that’s great for baking—something like Granny Smith or Honeycrisp will do the trick. They hold their shape and provide that perfect tartness against the sweetness of the sugar.
And, if you’re feeling adventurous, the addition of raisins or walnuts can add a delightful twist to the filling. Don’t worry if you’re not a fan of nuts; just leave them out. The key is to use what you love.
How to Make Apple Pie
Now that you have all your ingredients lined up and ready to go, it’s time to plunge into the delicious world of apple pie making. First, let’s tackle that flaky crust. In a large bowl, combine 2 cups of all-purpose flour with 1/2 teaspoon of salt. This is where the magic begins. Then, using a pastry blender (or your trusty fork if you’re feeling adventurous), cut in 2/3 cup of shortening until the mixture resembles little pea-sized pieces.
If you’re like me, you might get a bit floury, but hey, that’s half the fun, right? Next comes the water, or the secret ingredient for binding it all together. Sprinkle 1 tablespoon of cold water over the mixture, and gently toss it with a fork. Keep adding water, one tablespoon at a time, until the dough is moistened but not sticky.
Once you’ve got that dough looking just right, divide it in half and form each half into a ball. On a lightly floured surface, roll out one ball into a 12-inch circle, and gently transfer it to a 9-inch pie plate. Don’t stretch the dough, just ease it in there—think of it as giving it a cozy home. Now, let’s move on to that scrumptious filling, shall we?
For the filling, grab those 6 cups of thinly sliced peeled cooking apples (that’s about 2 1/4 pounds) and toss them in a large mixing bowl. Add 1 tablespoon of lemon juice to keep those apples from browning—nobody likes a sad-looking pie.
Then, mix together 3/4 cup of sugar, 2 tablespoons of flour, 1/2 teaspoon of ground cinnamon, and 1/8 teaspoon of ground nutmeg before sprinkling it over those apple slices. If you’re feeling a bit wild, throw in 1/2 cup of raisins or walnuts, but if that’s not your jam, just stick with the apples. Toss everything together, making sure each apple is coated in that sweet, spicy goodness.
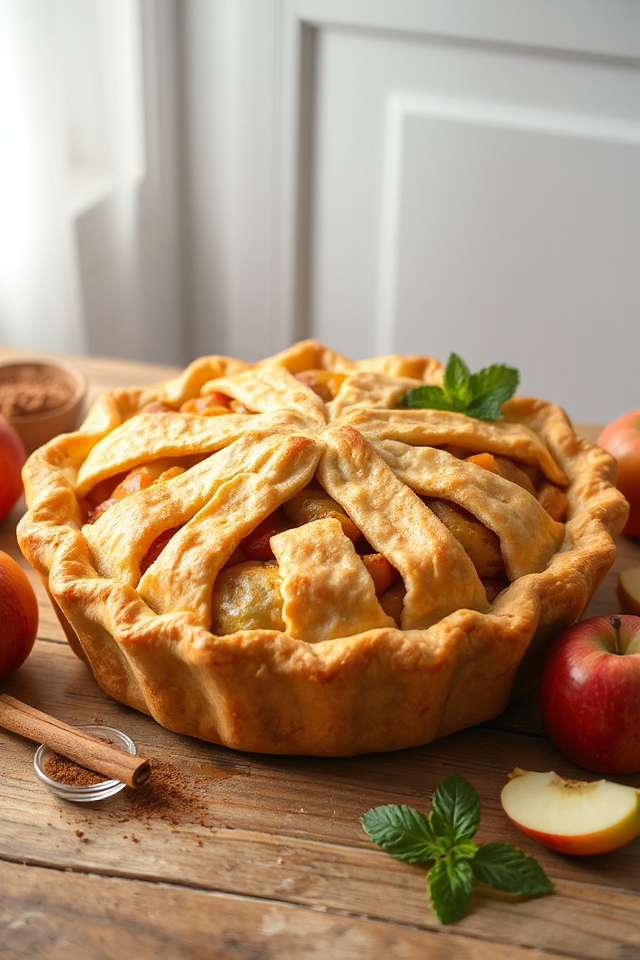
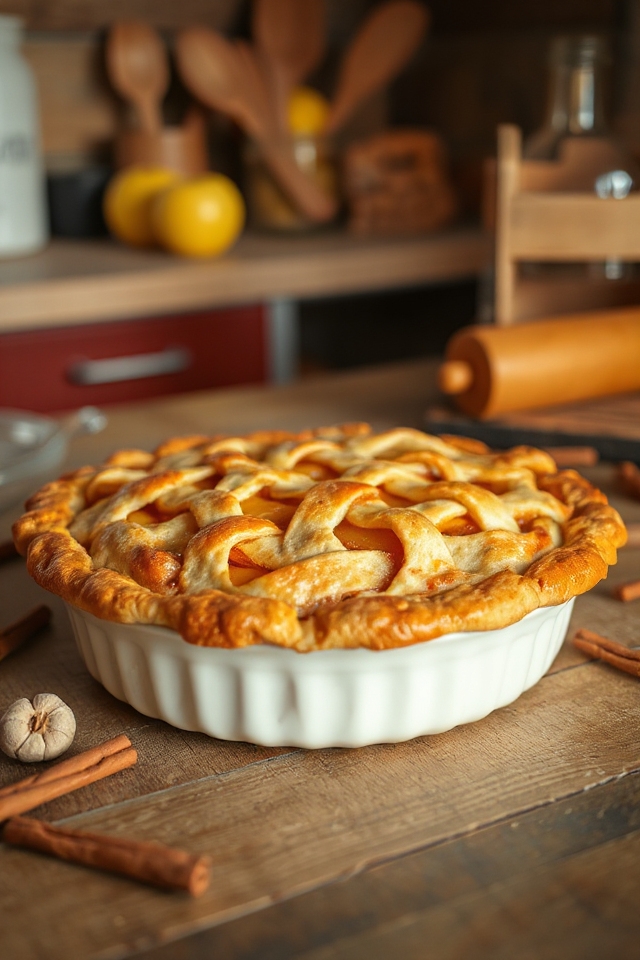
When it’s all mixed up, transfer the filling to your pastry-lined pie plate, roll out the second half of the dough, and place it over the top, cutting slits for steam. Seal it all up by crimping the edges, and you’re ready to bake.
Pop that beauty into a preheated oven at 375°F, cover the edges with foil to prevent over-browning, and bake for 25 minutes. After that, remove the foil and let it bake for another 35 to 30 minutes until the top is golden brown.
The aroma wafting through your kitchen is going to be something else. Once it’s done, let it cool completely on a wire rack (patience is a virtue, right?), and get ready to savor a slice of homemade goodness that will make you feel like a culinary hero.
Apple Pie Substitutions & Variations
After enjoying the process of crafting that perfect apple pie, you might find yourself wanting to switch things up a bit.
I love experimenting with different apple varieties; Granny Smith adds tartness, while Honeycrisp brings sweetness. You can also swap sugar for brown sugar or honey for a richer flavor.
If you’re feeling adventurous, throw in some spices like ginger or cardamom. For a nutty twist, replace raisins with chopped pecans or almonds.
And don’t forget about crust variations—try a crumb topping or even a savory herb crust for a delightful surprise. The possibilities are endless!
What to Serve with Apple Pie
When it comes to enjoying a slice of warm apple pie, a few delightful pairings can elevate the experience.
I love serving it with a scoop of vanilla ice cream; the creaminess perfectly complements the spiced apples. Whipped cream is another favorite of mine, adding a light, airy touch.
For a cozy twist, I sometimes pour a drizzle of caramel sauce over the pie. And if I’m feeling adventurous, I might even serve it with a slice of sharp cheddar cheese—trust me, it works!
These accompaniments create a delicious contrast that makes each bite unforgettable. Enjoy!
Additional Tips & Notes
To guarantee your apple pie turns out perfectly every time, I recommend using a mix of sweet and tart apples, like Granny Smith and Honeycrisp.
Also, don’t forget to chill your dough before rolling it out; it helps prevent shrinking while baking. If you want a glossy finish, brush the crust with an egg wash before baking.
For extra flavor, consider adding a pinch of vanilla extract or a splash of bourbon to the apple mixture.
Finally, let your pie cool completely before slicing; this allows the filling to set, ensuring perfect slices for serving. Enjoy your baking!