Why You’ll Love This Cake Pops Recipe
You’ll absolutely adore this Cake Pops recipe! It’s a delightful mix of fun and flavor, perfect for any occasion.
I love how easy it’s to customize these treats, whether you’re using leftover cake or trying out different frosting flavors. Each bite is a burst of sweetness, and the chocolate coating adds a delightful crunch.
Plus, they’re a hit at parties, bringing smiles to everyone’s faces. I can’t get enough of the colorful sprinkles that make them look irresistible.
Once you try making them, you’ll find it hard to resist the joy of creating and sharing these tasty little treats!
Ingredients of Cake Pops
Alright, let’s plunge into the fun world of cake pops! If you’ve ever found yourself with leftover cake or just a craving for something sweet, this recipe is perfect for you. Not only are cake pops delicious, but they’re also a blast to make, especially if you’re looking to impress friends or family.
Imagine the joy on their faces when you present them with these colorful, bite-sized treats. So, gather your ingredients and get ready to create some magic in the kitchen.
Here’s what you’ll need to whip up a batch of these delightful cake pops:
- 1/2 cake, cooked and cooled (or any amount you wish)
- 2 tablespoons frosting (or more as needed)
- 1 cup chocolate chips (or candy melts; you may need more depending on the size of your cake)
- 2 tablespoons candy sprinkles
- 12 lollipop sticks (you might need more if you’re making a lot)
Now, let’s talk about some other considerations regarding the ingredients. When it comes to the cake, don’t feel restricted to just one flavor; you can mix and match whatever you have on hand, from chocolate to vanilla to something a little more adventurous like red velvet.
The frosting is also a great place to get creative; a cream cheese frosting could add a nice tang, while a rich buttercream would be a sweet pairing.
And as for the chocolate coating, candy melts come in a rainbow of colors, so you can match them to any theme or occasion. Just remember, the key to a good cake pop is the right balance of cake to frosting—too much frosting, and you’ll end up with a mushy mess; too little, and they won’t hold together.
It’s all about finding that sweet spot! So, let’s get ready to roll some cake balls and dip into some chocolatey goodness.
How to Make Cake Pops
Now that you’ve gathered your ingredients—half a cake, two tablespoons of frosting, one cup of chocolate chips (or candy melts), and some sprinkles—let’s plunge into the delightful world of making cake pops.
First off, take that cooled cake and break it into smaller pieces. If you have a food processor, toss the cake in there and let it whir until it’s reduced to fine crumbs. If you don’t have a processor, well, let’s just say it’s a great workout for your arms. Just crumble it up by hand, but be prepared for some cake crumbs to go rogue and scatter across your kitchen.
Once your cake is crumbly, grab those two tablespoons of frosting. This is where the magic happens. Add the frosting to the crumbs, but be careful not to drown the cake in frosting. You want just enough to hold everything together—think of it as a delicate balancing act. Mix it until you can form a dough that holds its shape.
Now comes the fun part: roll the mixture into 1 to 1.5-inch balls. I always find that this is when things get a little messy, but that’s half the fun, right? Place those little cake balls on a cookie sheet lined with wax paper or parchment paper, and get ready for the next step.
Now, let’s bring on the chocolate. Melt your one cup of chocolate chips (or candy melts) following the package instructions. Here’s a pro tip: dip one end of your lollipop sticks into the melted chocolate before inserting them halfway into the cake balls. This little trick helps secure the stick, preventing any cake pop disasters later on.
After you’ve stuck all the cake balls, pop them in the fridge for about 30 to 60 minutes. This chilling time is essential—it helps the chocolate harden, so your cake pops don’t go tumbling off their sticks like it’s a game of musical chairs.
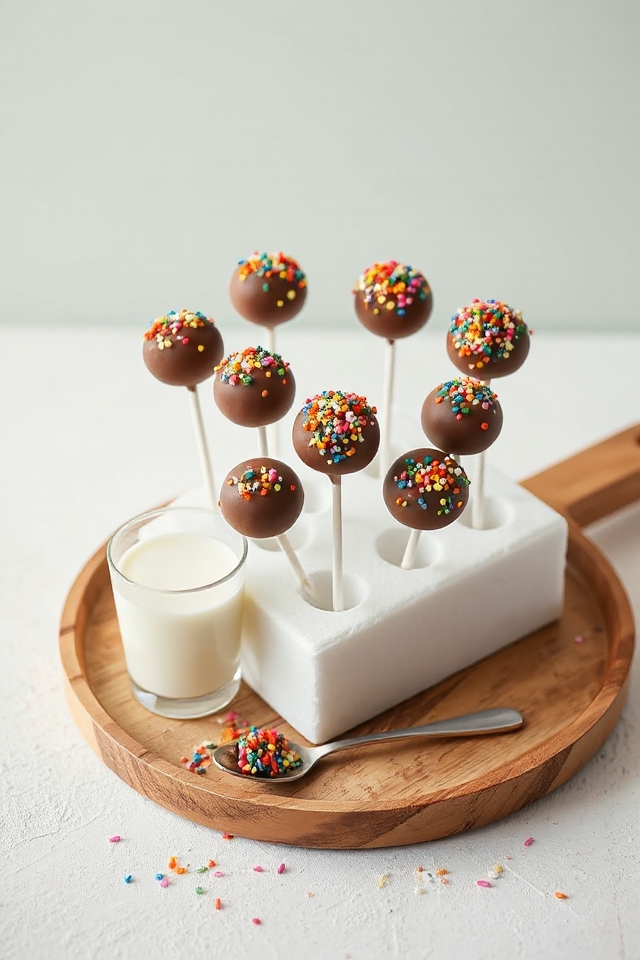
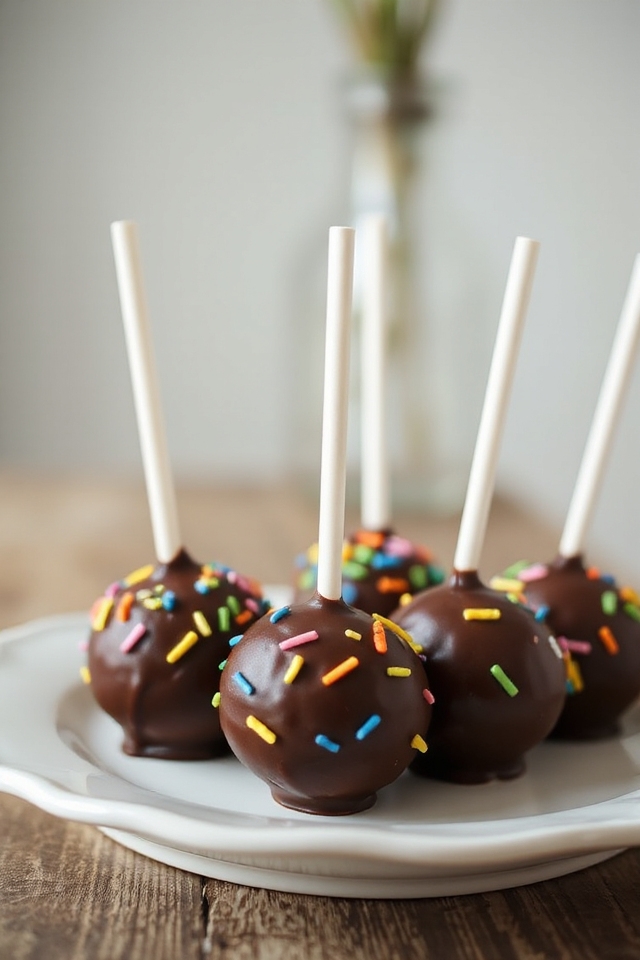
Once they’re firm, take them out, re-melt the chocolate if needed, and dunk those cake balls! Swirl them around until they’re coated, then sprinkle on some candy sprinkles for a touch of flair.
Let them rest upright in a piece of styrofoam until the chocolate sets, and voilà! You’ve just made your own cake pops—now all that’s left is to share (or not, no judgment here).
Cake Pops Substitutions & Variations
While making cake pops is a fun and creative process, experimenting with substitutions and variations can elevate your treats even further.
You can swap out the frosting for cream cheese or nut butter for a unique flavor twist. Instead of traditional chocolate, try white chocolate or colored candy melts to match a theme. For a gluten-free option, use almond flour or a gluten-free cake mix.
Add flavor extracts like vanilla or almond for an extra kick. Don’t forget about fillings—think about using fruit preserves or cookie dough inside for a delightful surprise.
The possibilities are endless, so get creative!
What to Serve with Cake Pops
When planning what to serve with cake pops, consider pairing them with complementary snacks and beverages that enhance their delightful sweetness.
I love serving them alongside fresh fruit like strawberries or blueberries, which add a revitalizing contrast. For drinks, a rich hot chocolate or a light sparkling lemonade works wonders.
If you’re hosting a party, think about including a cheese platter for a savory touch. You could also set out some chocolate-dipped pretzels for added crunch.
These combinations not only elevate the experience but also make for a visually appealing dessert table that your guests will adore!
Additional Tips & Notes
To guarantee your cake pops turn out perfectly, I recommend paying attention to the texture of the cake mixture; it should be moist but not overly sticky.
If you find your mixture too dry, add a touch more frosting. When melting candy, do it in short bursts to avoid burning.
If you want a smooth finish, tap off excess melted candy before adding sprinkles. For a fun twist, experiment with flavored cake or colored candy melts.
Finally, chill your pops thoroughly before serving; it helps them hold their shape and enhances the presentation. Enjoy your delicious creations!